This simple DIY will make using and storing your cast iron a breeze everyday of the week! AKA: How to stop using your oven as cast iron storage!
This blog does not use AI.
(This post contains affiliate links, which means I make a small commission at no extra cost to you.)
Why do people store cast in their ovens?!
Please comment below if this method of storage actually saves you time! Basically everyone I know at some point has stored pots or pans in their oven. This make NO SENSE to me! What do you do when you forget it is in there and preheat your oven to 450F?! Do you just make room for a crazy hot pan, or several, on your counter?! With little kids around, that is a hard NO for me. That would make my life TEN TIMES harder! I want systems in my home that work for me, not against me.
Why is cast iron tricky to store?
There are a couple of “issues”:
- WEIGHT: Cast iron is heavy and it can be difficult to support the weight when lifting it out of cabinets. I personally have wrists that get strained easily, so pulling heavy cast iron down from top cabinets or up from bottom cabinets is not a viable long term solution. Also, stacking it on top of, or below, other baking dishes would result in my breaking the dishes for sure!
- SIZE: Most cast iron is wide and rigid. This means that they take up a lot of cabinet space, but cabinet, or drawer, space is prized in my kitchen. Consequently, it can be difficult to fit large unwieldy pieces in my kitchen.
- SEASONING: Cast Iron needs to be seasoned to be effectively non-stick. That means that you do not want the surface of your well seasoned pan to get scratched by another cast iron skillet, or anything else in your cabinet! For a brief period of time I stored my cast iron stacked in a cabinet with paper towels between them. Did this work? Yes. Did I avoid using my cast iron because it was too inconvenient to get out? Also, yes.
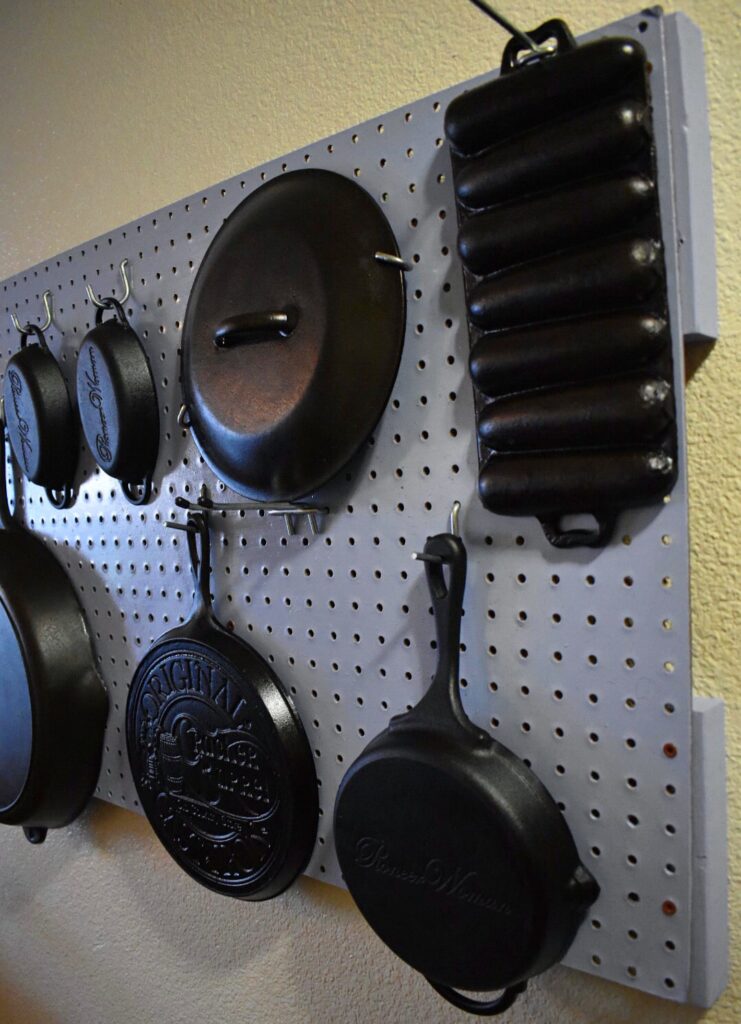
Why vertical storage is the best option for cast iron?
All of the reasons listed above are mitigated!
- WEIGHT: You can use wall anchors and the weight of cast iron isn’t a problem at all. With my weak wrist I needed pulling these off the wall to be easy and accessible. After almost 3 years of use , I can definitely say it is!
- SIZE: Your peg board can be as large as you need it to be! You can also do several small boards throughout your house if you don’t have one wall big enough. I know people love to collect vintage cast iron!
- SEASONING: When you hang the skillets, lids, or baking dishes from the peg board you do not have to worry about the seasoning scratching at all! Simply ensure that the hooks are far enough away from each other, so that when the cast iron pieces hang off of them they don’t touch each other.

Supplies List
- 2ftx3ft peg board
- Newspaper or an old sheet, for covering the floor while you paint.
- Paint, sample size
- Paint brush
- Polyurethane
- Paint key
- Tape measure
- Pencil
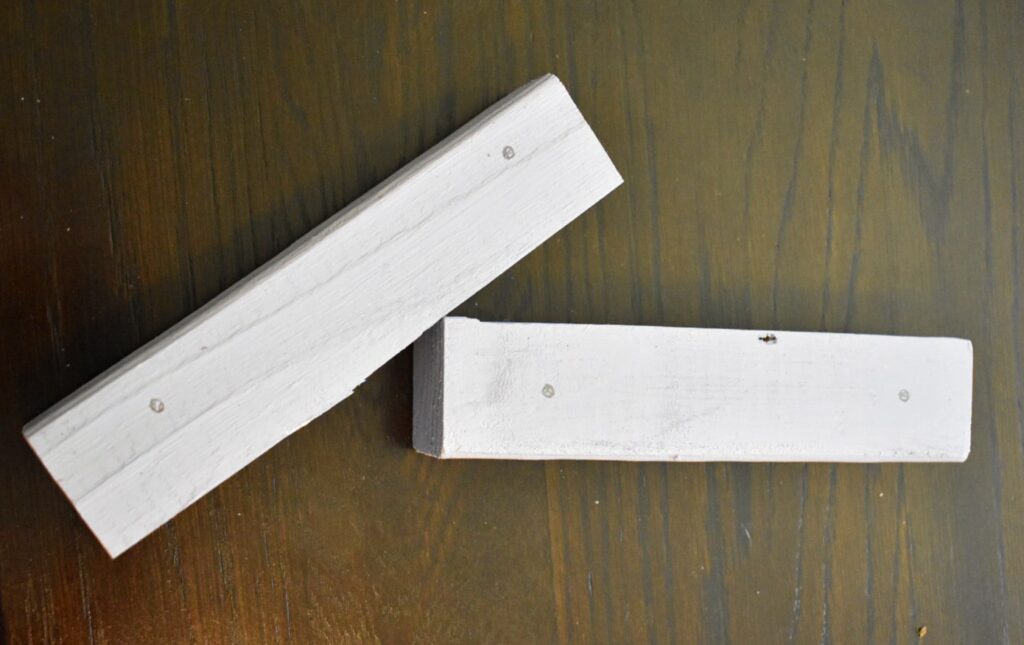
- (6) 6 inch long 2×2 boards, called backing in this post
- Drill
- Drill bit 7/64”
- Philips head screwdriver
- (12) 2.5-3 inch screws, they need to be long enough to go through the backing and sheet rock anchor/stud.
- Level
- Stud finder
- (12) sheet rock anchors, this depends on how many studs you have behind your peg board.
Procedure
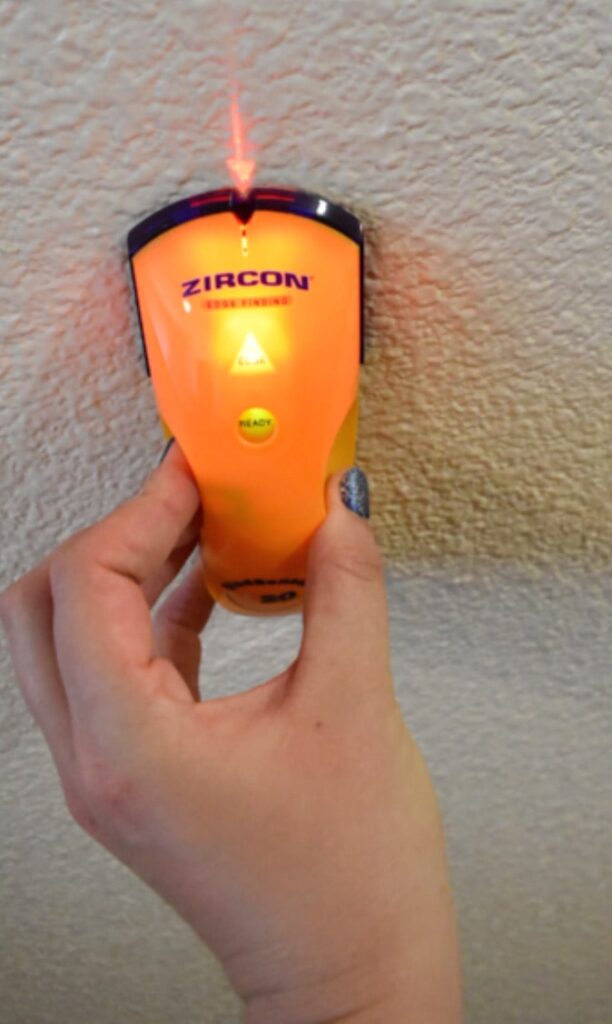
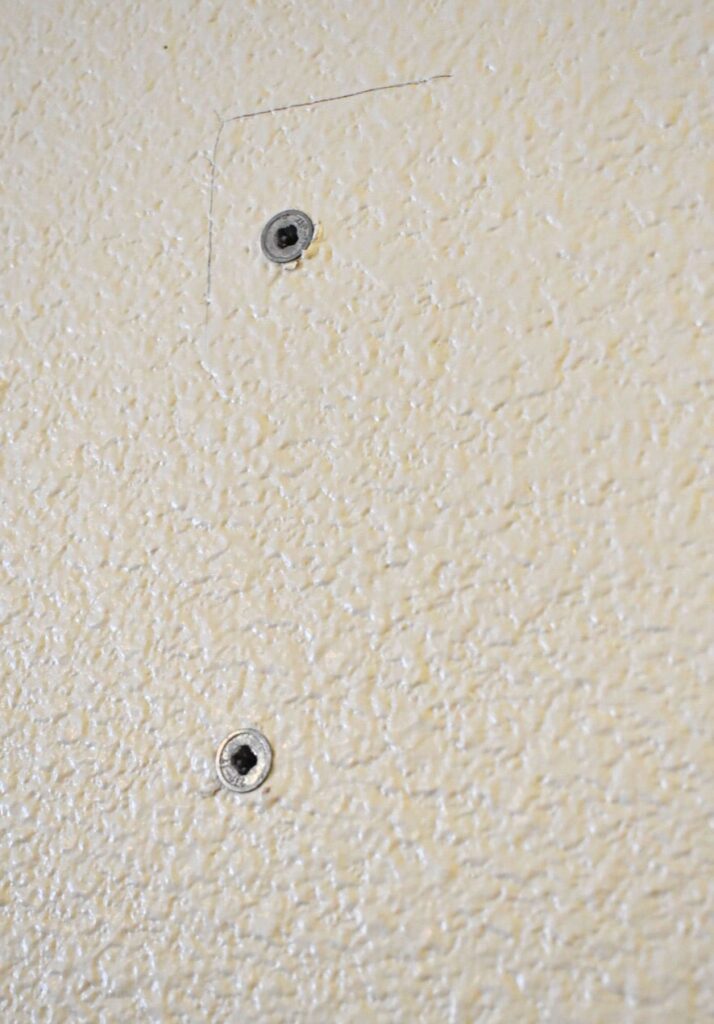
1. Firstly, ensure that you have appropriate wall space for your cast iron storage. Locate your studs and mark them with pencil.
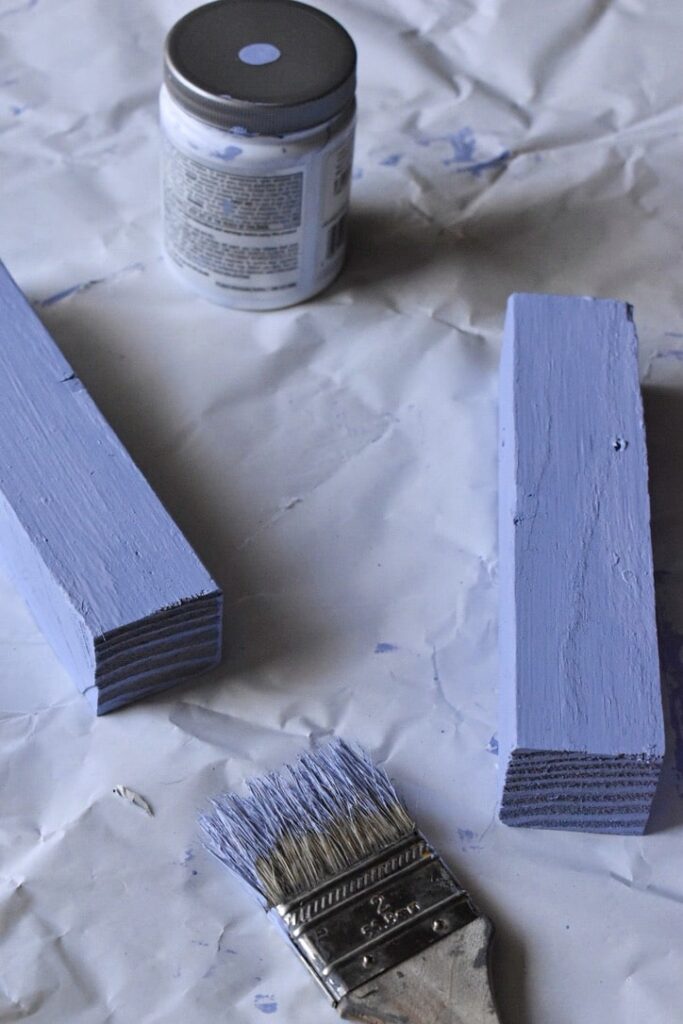
2. Secondly, collect all of the needed supplies, including picking your paint color. Line an area with newspaper, or packing paper, to paint your peg board.

3. Now that you have lined your space, shake your sample paint can and paint two layers of paint on the peg board, allowing the paint to fully dry in between layers. Also, paint the 2×2 6 inch sections with two coats of paint.
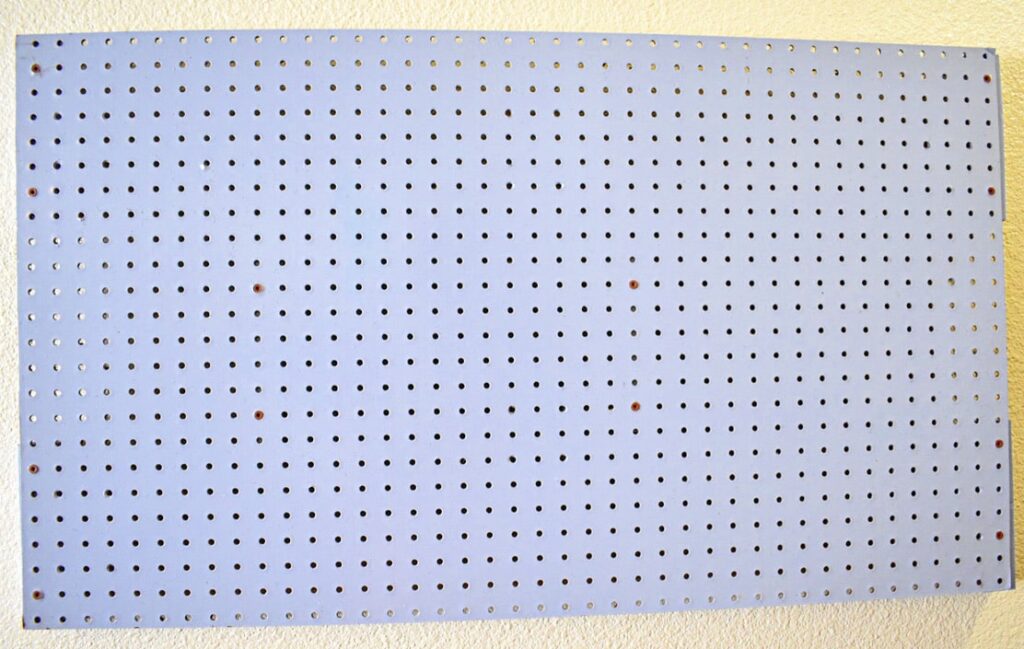
4. Once the second coat has fully dried, take your peg board to the spot you intend to hang it and ensure that you like the color. After you proceed to the next step changing the color will be a challenge!
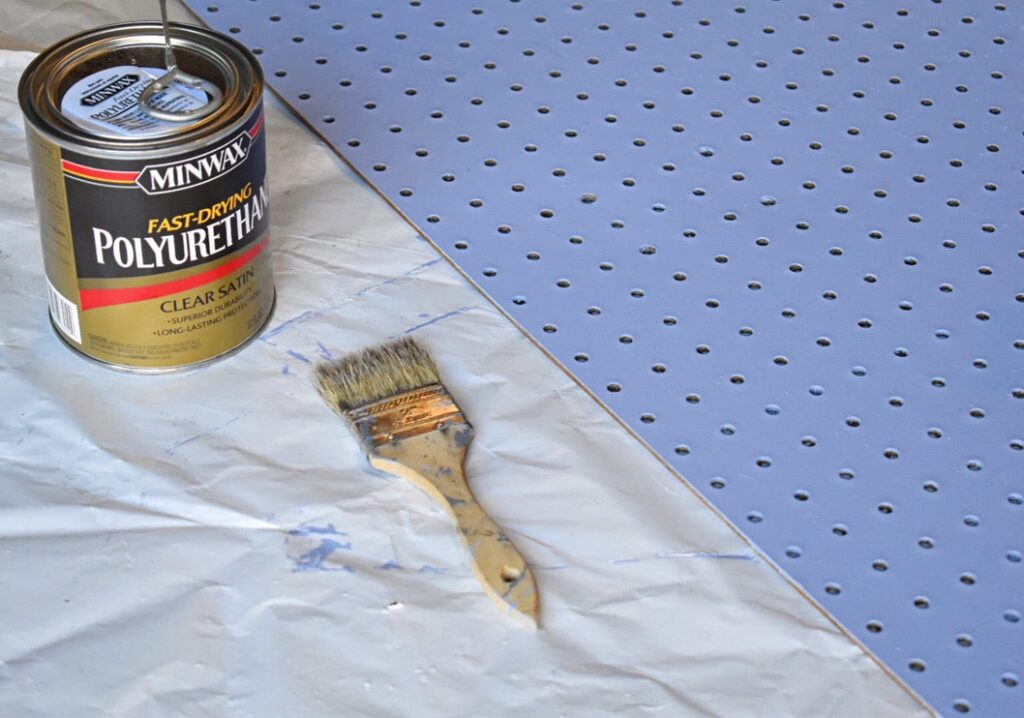
5. Once you have approved the color, paint the peg board with a coat of polyurethane. The coasting will ensure that no scratches or marks will mar your cast iron storage board, and add a shine. Allow layer to fully dry.
6. Use the pencil marked studs and a level to orient your peg board on the wall. I intentionally planned the location of my peg board based on the studs. I wanted at least one corner to be along a stud.
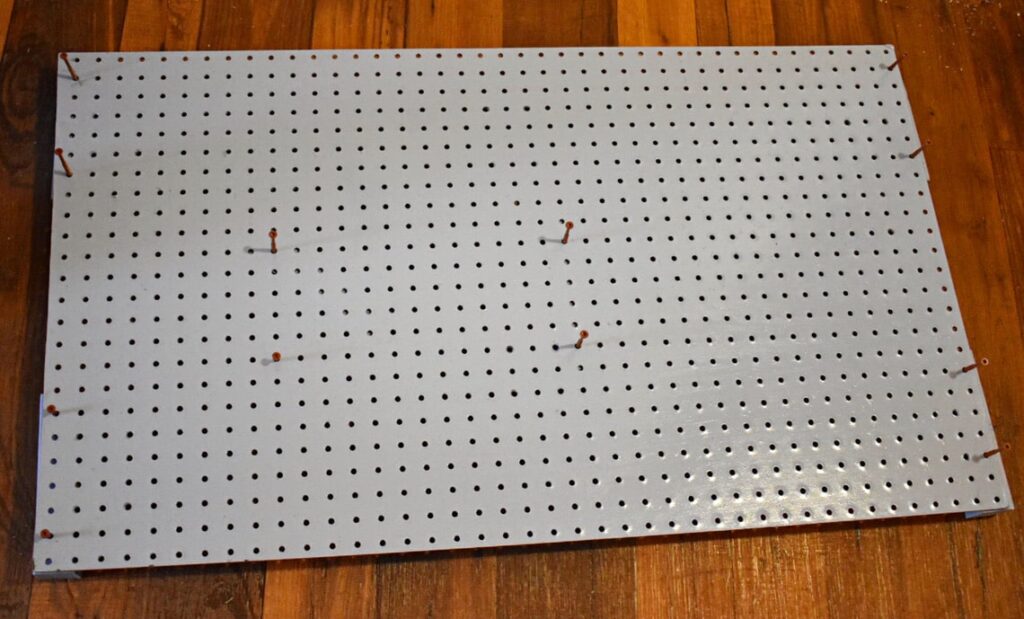
7. Once you have located your studs it is time to hold up the board and select where your 2×2 backing is going to go. I personally put one on each corner and two toward the center. This is based on what you are trying to hang, specifically keep in mind that you will not be able to use the holes directly behind the backing pieces.
8. Measure and place your sheet rock anchors intentionally. I used sheet rock anchors at the corners that did not have studs, but not behind the middle backing pieces.
9. You will then line your backing pieces up with the holes you intend to block on the peg board and trace the holes with a pencil.
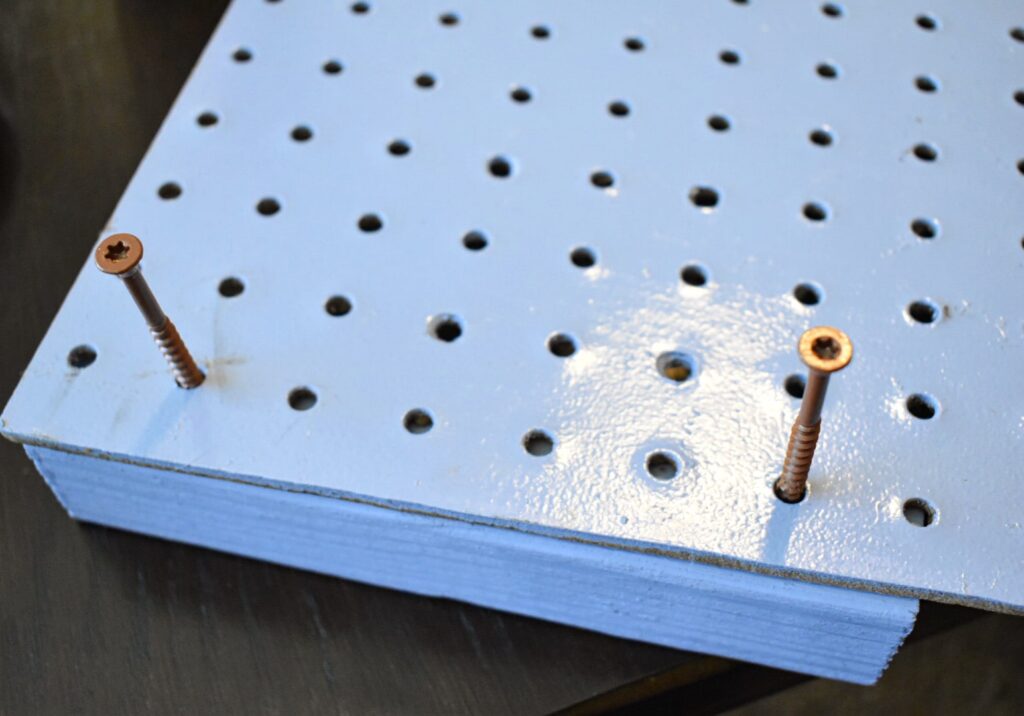
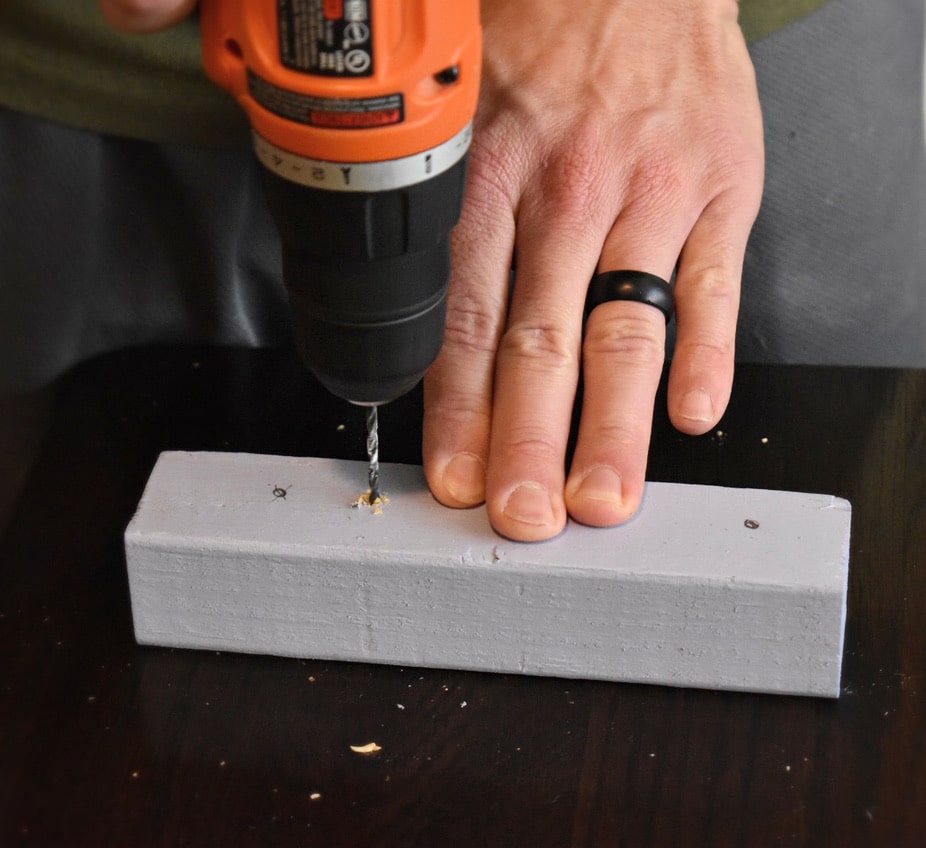
10. Once traced, brace the 2×2 on a surface you don’t mind getting scratched and pre drill the two holes per board, all the way through the board.
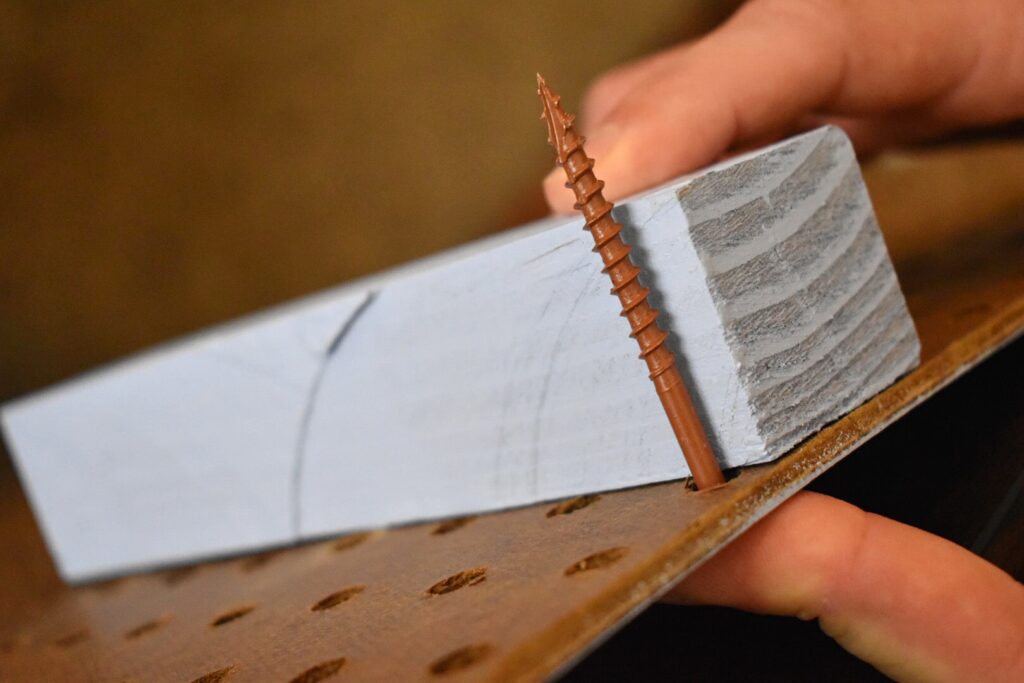
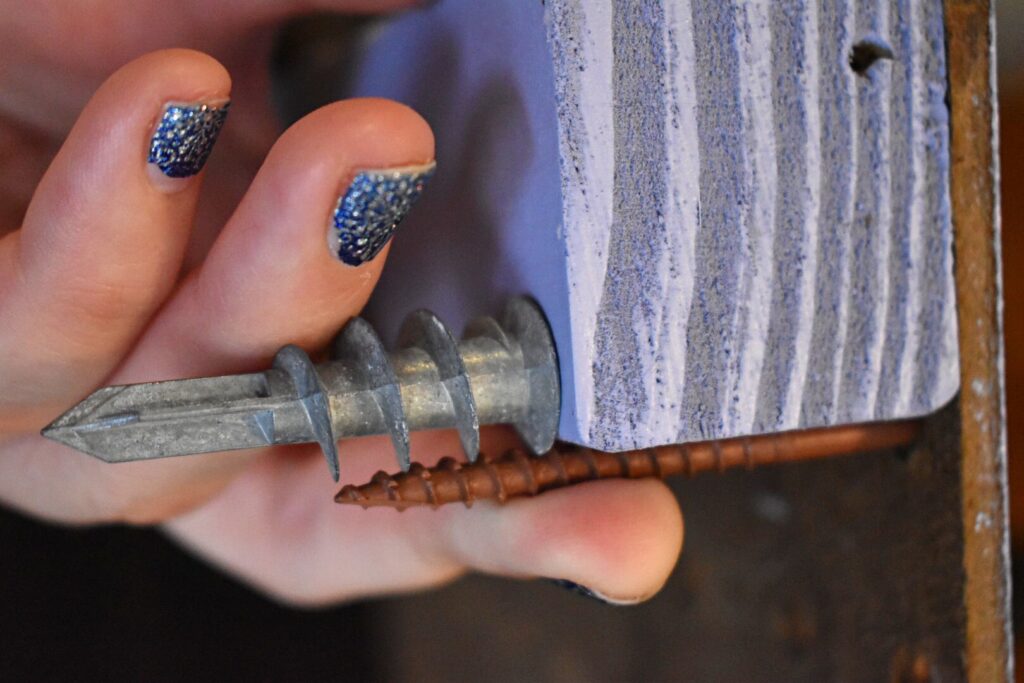
11. Then line up the piece of backing with the designated holes and screw the screw about half way through the piece of backing. You don’t want it all the way through because you need it to be on the wall before it exits the backing piece.
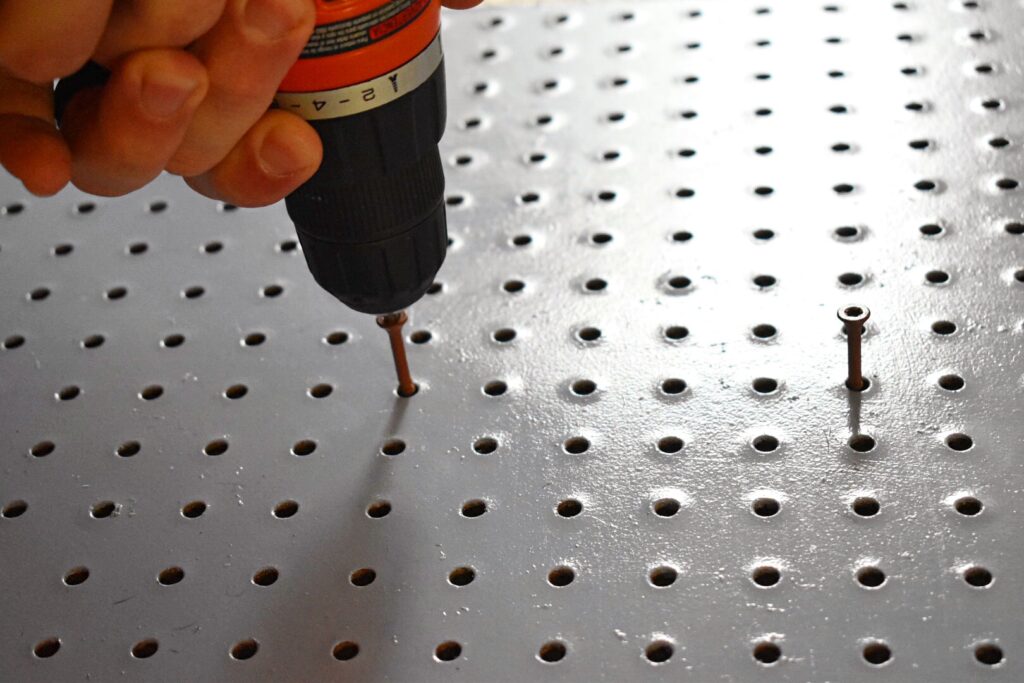
12. Now it’s finally time to position the assembled peg board on the wall, and screw the screws through the sheet rock anchors and studs. A second person was particularly helpful at this stage!
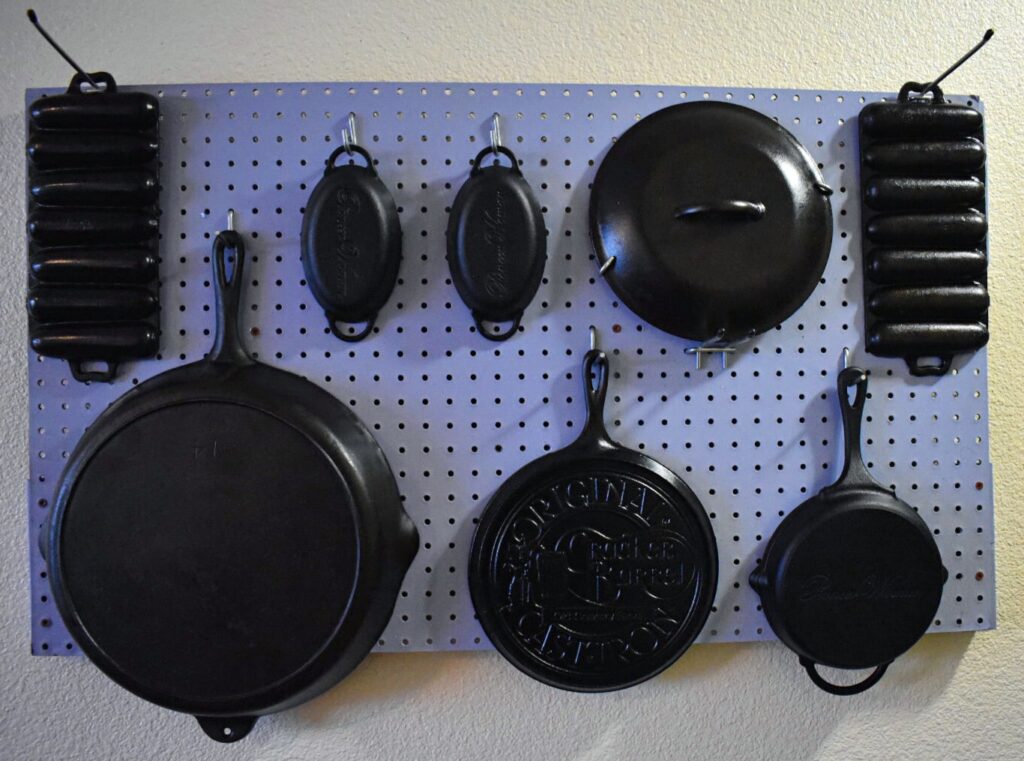
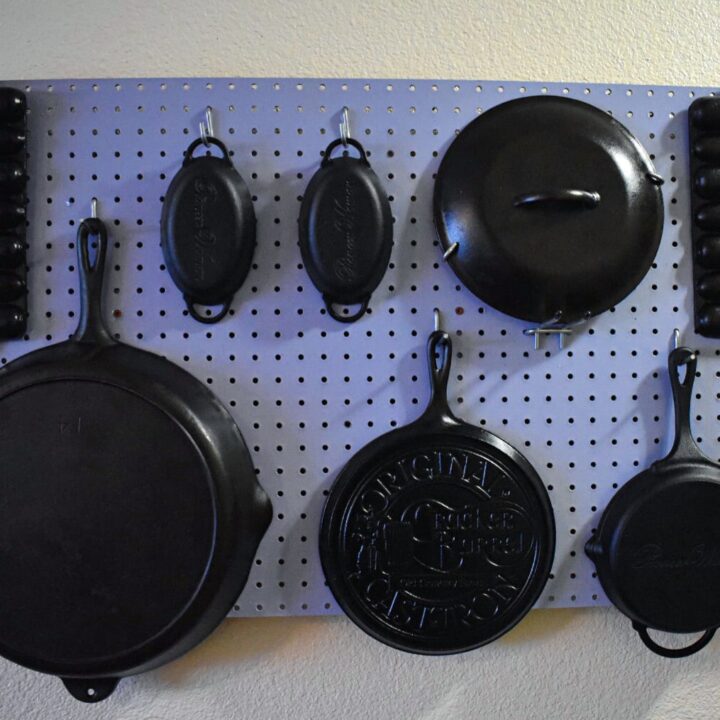
13. Congratulations! Your Peg board is now safely on the wall! Lastly, please use whatever hooks you may desire to hang your cast iron! Following is a list of the types of hooks that I used.
Hooks used:
- Large double arm hook (could use small, I just didn’t have one)
- 2 large U hooks. (I used the U hooks and double arm hook to hold the cast iron lid in place.)
- 2 small U hooks
- 2 long single arm hooks
- 3 large L hooks
Cast Iron Storage
Materials
- 2ftx3ft peg board
- Newspaper or an old sheet, for covering the floor while you paint.
- Paint, sample size
- Paint brush
- Polyurethane
- Paint key
- Tape measure
- Pencil
- (6) 6 inch long 2x2 boards, called backing in this post
- (12) 2.5-3 inch screws, they need to be long enough to go through the backing and sheet rock anchor/stud.
- (12) sheet rock anchors, this depends on how many studs you have behind your peg board.
Tools
- Drill
- Drill bit 7/64”
- Philips head screwdriver
- Level
- Stud finder
Instructions
1. Firstly, ensure that you have appropriate wall space for your cast iron storage. Locate your studs and mark them with pencil.
2. Secondly, collect all of the needed supplies, including picking your paint color. Line an area with newspaper, or packing paper, to paint your peg board.
3. Now that you have lined your space, shake your sample paint can and paint two layers of paint on the peg board, allowing the paint to fully dry in between layers. Also, paint the 2x2 6 inch sections with two coats of paint.
4. Once the second coat has fully dried, take your peg board to the spot you intend to hang it and ensure that you like the color. After you proceed to the next step changing the color will be a challenge!
5. After you have approved the color, paint the peg board with a coat of polyurethane. The coasting will ensure that no scratches or marks will mar your cast iron storage board, and add a shine. Allow layer to fully dry.
6. Use the pencil marked studs and a level to orient your peg board on the wall. I intentionally planned the location of my peg board based on the studs. I wanted at least one corner to be along a stud.
7. Once you have located your studs it is time to hold up the board and select where your 2x2 backing is going to go. I personally put one on each corner and two toward the center. This is based on what you are trying to hang, specifically keep in mind that you will not be able to use the holes directly behind the backing pieces.
8. Measure and place your sheet rock anchors intentionally. I used sheet rock anchors at the corners that did not have studs, but not behind the middle backing pieces.
9. You will then line your backing pieces up with the holes you intend to block on the peg board and trace the holes with a pencil.
10. Once traced, brace the 2x2 on a surface you don’t mind getting scratched and pre drill the two holes per board, all the way through the board.
11. Then line up the piece of backing with the designated holes and screw the screw about half way through the piece of backing. You don’t want it all the way through because you need it to be on the wall before it exits the backing piece.
12. Now it’s finally time to position the assembled peg board on the wall, and screw the screws through the sheet rock anchors and studs. A second person was particularly helpful at this stage!
13. Congratulations! Your Peg board is now safely on the wall! Lastly, please use whatever hooks you may desire to hang your cast iron! Following is a list of the types of hooks that I used.


Leave a Reply