Sourdough bread has such a delicious unique flavor, and with only five ingredients, you can make your very on tasty rustic sourdough bread!
This blog does not use AI.

(This post contains affiliate links, which means I make a small commission at no extra cost to you.)
Why is Sourdough Bread Special?
In short, sourdough is tastier and better for you than store bought breads, even when using conventional flour. The yeast, or rising agent, in sourdough bread is active and alive so it requires a long time to ferment, or rise. The fermentation process is hands off and takes up the bulk of time in this recipe. It also cultivates the tasty, distinctive flavor profile of sourdough bread. Fermentation makes the bread more digestible for us and introduces healthy gut bacteria. Sourdough is still a simple carb but it has a lower glycemic index, in some people, than store bought white breads. Making bread at home also means fewer preservatives in your diet, compared to store bought.
Important Bread Factors
- Temperature- When allowing bread to rise in your home, it is important to know how temperature will affect the yeast. If your environment is colder than 70F (21C) degrees, then your bread may take longer to rise. Yeast activity is slowed down in cooler environments. If your house is above 70F (21C) degrees, then your bread may rise faster than expected. When I have my stove on throughout the day, my bread rises faster, because my kitchen gets very warm! I store my sourdough starter in the refrigerator, when not in use, because cool or cold environments slow down, almost halt, yeast activity.
- Flour- I use unbleached all purpose flour. I hope to have a wheat mill one day, but that day is not today. Typically I use King Arthur Flour because they are a trustworthy brand. If that isn’t available, or cost effective I will use any organic, unbleached, all purpose flour. Bleached flour has all nutrients removed, and I don’t keep that on hand.
- Water- I exclusively use filtered water. That may be because we have hard water that taste terrible. In bread baking I intentionally use filtered water to protect the yeast. With tap water the yeast might need to compete with existing bacteria or fight trace chemicals. The choice is yours, of course. I personally have had more consistent results with filtered water, but have tried both. As an aside, when we first moved to Southern California I did try tap water in my sourdough and my starter did not bubble nearly as much as before, or after I switched to filtered water. I filter my water with a Berkeley Water Filter.
What happens if I mess up, and the bread is terrible?
If the bread is terrible… try again! You are out a few ingredients, but this loaf is fairly cost effective. You are doing yourself a disservice if you don’t try to make bread! It takes a few tries to get it “right” but it is a fun process. Everyone has a bad loaf, even years in! Pick up your apron and try again. Bread sounds complicated but isn’t. People have been making bread for centuries! I would bet, most didn’t know the science behind their actions, they simply tried until they got results.
Helpful Techniques
Autolysing
You may have come across this word before if you have explored sourdough bread recipes. What does autolysing truly mean. You may have wondered, is this step actually necessary to making tasty sourdough bread? According to many trusted sources, yes! When you allow the water, flour, and stater to rest for 30 minutes you are allowing for full saturation of the flour, encouraging gluten development, dropping the kneading time, and allowing for a slower fermentation that results in more flavor. That is a lot of benefit packed into 30 minutes! For my science nerds, like me, autolyse means to self-digest. The protease enzyme in flour is eating the protein, allowing the dough to stretch, and the amylase enzyme is converting the starch to simple sugars the yeast can eat, allowing the bread to rise.
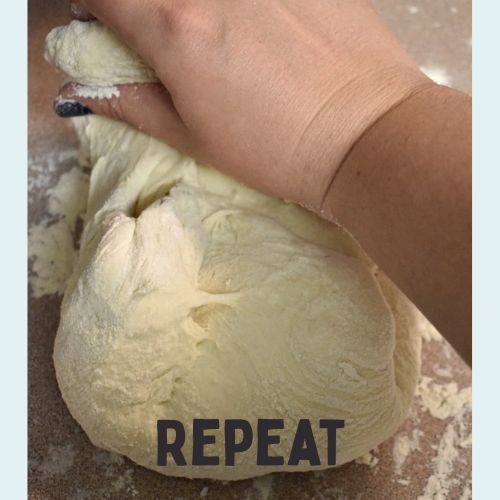
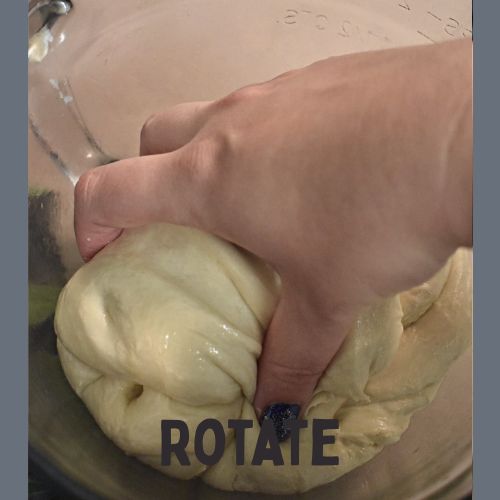
Kneading
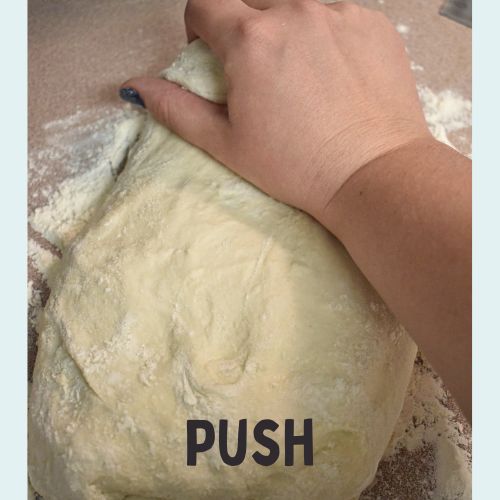
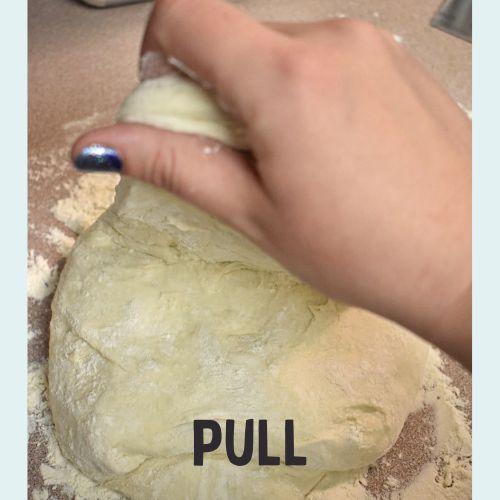
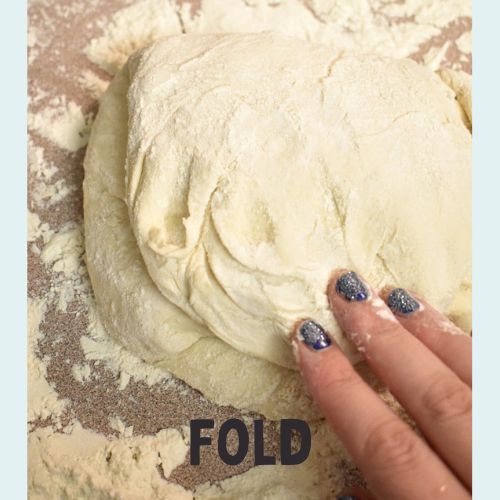
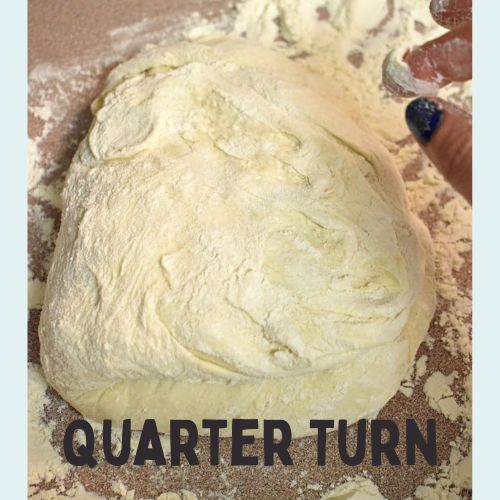
There are many kneading techniques, but to me it feels similar to play doh, with purpose. Kneading’s purpose is to develop gluten stands. Gluten is the protein in flour that forms bread‘s structure. Kneading is centralized and cyclical, the goal is to work everything back to the center in a circular fashion. I gently push the dough away with my right hand, I’m right handed, while supporting the remaining dough loosely with my left hand. Then I use my right finger tips to gently fold the dough back into the center. Rotate the dough 90 degrees, and repeat the gentle pushing/folding process. I am creating a central core of dough that doesn’t move. You do not want to rip the dough, breaking gluten strands, you want to stretch the dough. Be gentle yet firm. You are finished kneading when the dough fells smooth and supple.
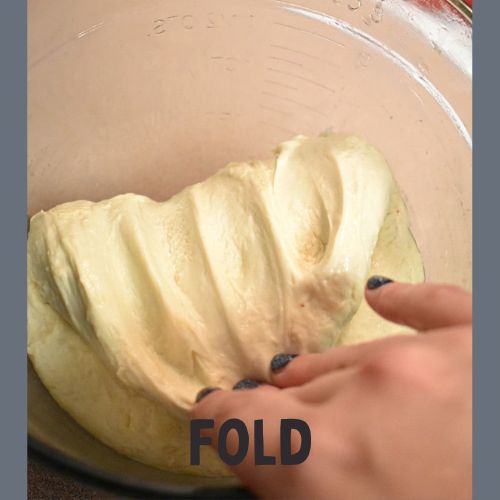
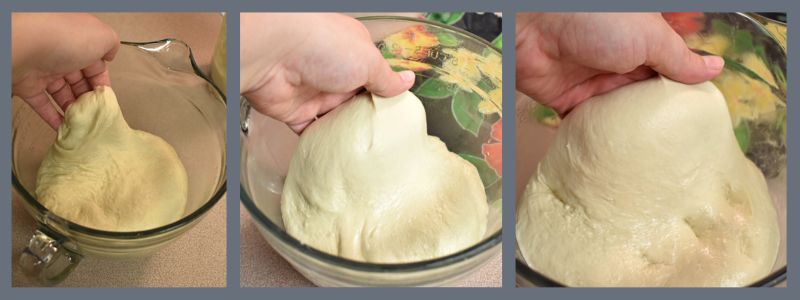
Stretch and Fold
This method is utilized after the dough has been kneaded and is beginning its first rise. King Arthur Flour Company explains why this technique helps make such a tasty rustic sourdough bread. Stretching and folding the dough over itself strengthen the dough and increase the length of the gluten strands. The longer the gluten strands, the more elastic your dough. Elasticity allows your bread to expand and trap the carbon dioxide. Carbon dioxide is a bi-product of yeast digesting sugars then converting them to starch. Also, the stretch and fold method allows the dough to have a more consistent temperature throughout. This gives a consistent rise.

Shaping
Without shaping your loaf won’t have the correct texture or shape. A rustic sourdough loaf should be beautiful as well as tasty. I pour my risen dough onto my counter to shape about halfway through bulk fermentation. Little to no flour on your counter is important because you need the resistance of the counter to properly shape the bread. I take both hands to the far side of the dough on the counter, and gently pull towards me, with my pinky’s tucked underneath the dough. You are creating surface tension and gently stretching the top layer of dough, down and around. Rotate the dough a quarter turn, and do the process again. Once every direction is covered, I place the dough back in the bowl for its second rise. Shaping, just like stretching and folding, strengthens the dough and encourages the loaf to rise up, instead of spread out.
Sourdough Bread Baking Tools
Bench Scrapper
This tool, like most listed here, is not required, but is extremely helpful. When the bread is sticky, during the kneading process, I use this tool instead of my other hand. I am able to pick up the entire lump of dough, turn it 180 degrees, and continue kneading. It is also helpful in removing the bits of dough that gets stuck to my counter. I just fold those bits back into the bread.

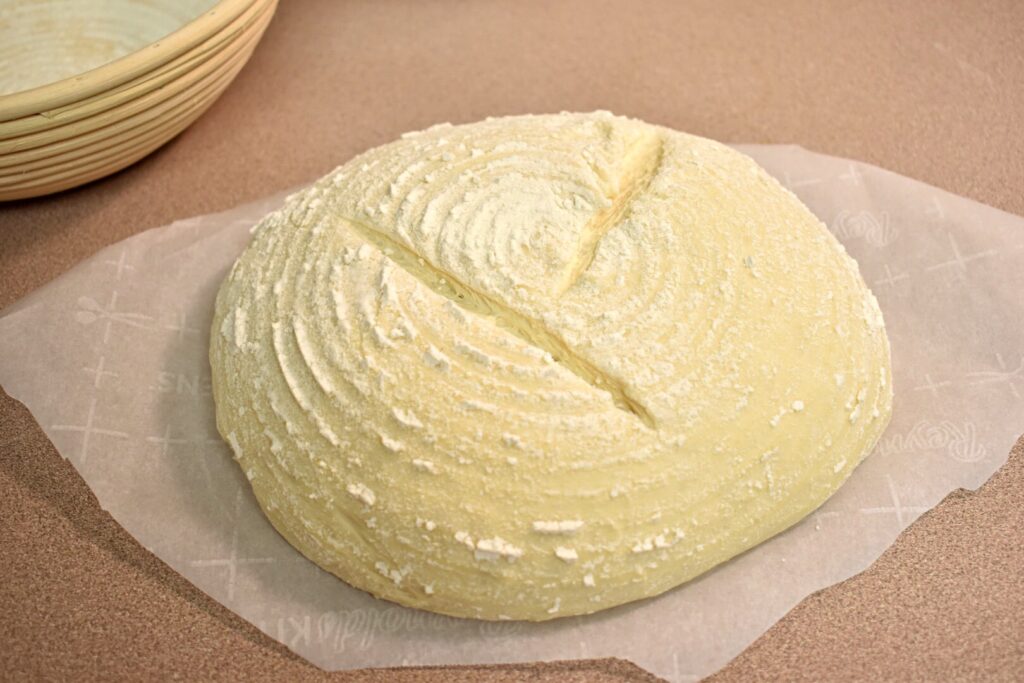
Cane Banneton Basket
A banneton basket is very useful for the final proof. It creates the rustic round shape for your sourdough loaf. It also leaves very pretty concentric flour rings on top of the bread. To use a banneton basket I, using a small sifter, lightly sprinkle flour over the inside, and then place the bread inside, to rise. I have a linen cover that goes over my banneton when I’m not usIng it. The cover prevents dust from getting into the creases. I do not recommend washing your banneton, the more you use it the better it will be because flour build up is what makes it non-stick. Be sure to get a banneton of similar diameter to your baking dish, in my case a round cast iron dutch oven.
Bread Lame
I do not own or use a bread lame, but many people love theirs and carve intricate designs into their bread. A bread lame is a razor blade with a handle, used to score designs onto your bread. Since we are going for a tasty rustic loaf a lame is not necessary, I use a regular bread knife. It is important to score, or cut, your bread in at least two locations. When bread rises it will burst somewhere, the score marks allow you to control where the bread splits.
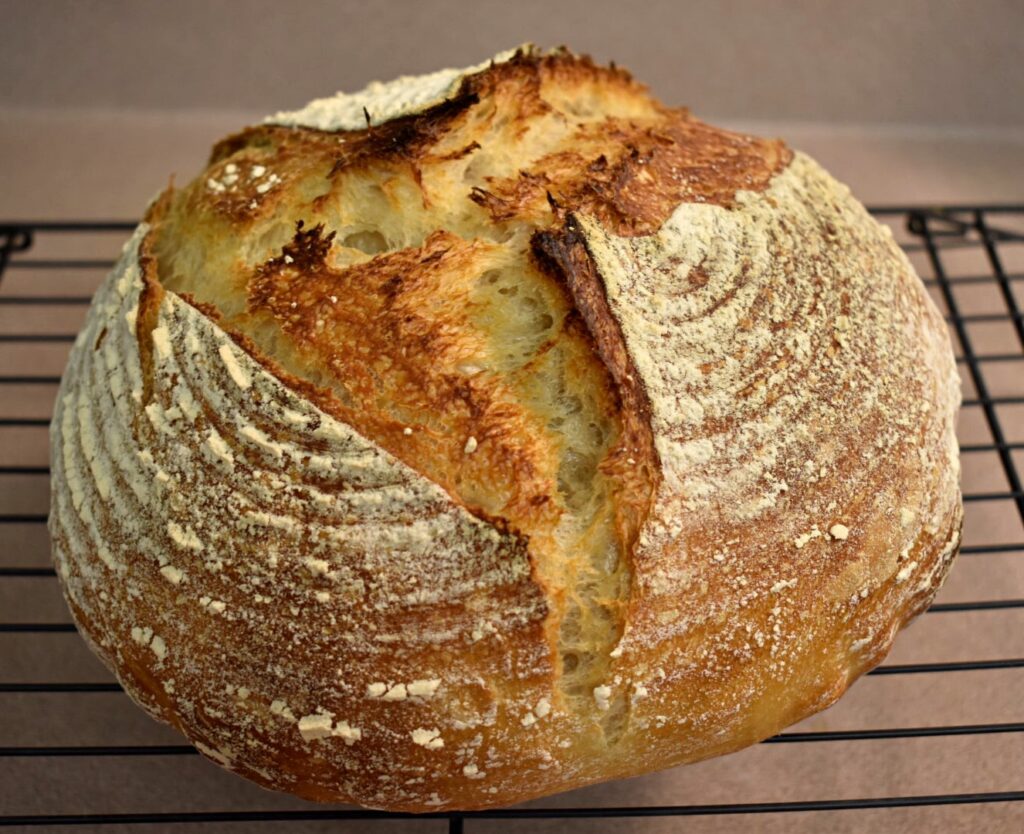
Cast Iron Dutch Oven
This is the only tool I will say is absolutely essential for this tasty rustic sourdough bread. In my opinion, you have not made sourdough correctly without a cast iron dutch oven. The cast iron evenly distributes heat and allows the bread to rise evenly. Baking with the top on for the first 25 minutes creates a steam oven within your conventional oven. You want the steam to create that crunchy crust that is so quintessential of a rustic sourdough loaf. You are able to get the golden brown coloring when the top is removed for the last 15 minutes of baking. I would highly recommend a simple cast iron dutch oven to up your baking game.
Other tools you may need:
- Wooden Spatula
- Kitchen Scale
- Measuring Cups
- Measuring Spoons
- Glass bowls
- Cooling Rack
- Quart Mason Jars
- Leak Proof Lids
- Danish Dough Whisk
Tasty Rustic Sourdough Bread
Ingredients
- 1 1/4 c filtered water
- 170 g active sourdough starter
- 375 g unbleached all-purpose flour + more for kneading
- 2 tsp salt
- 1 tbsp honey
- 1 tsp olive oil
- parchment paper
Directions:
1.Combine water, starter, and flour into a large bowl, mix thoroughly. Allow to autolyse, or rest, 20 minutes.
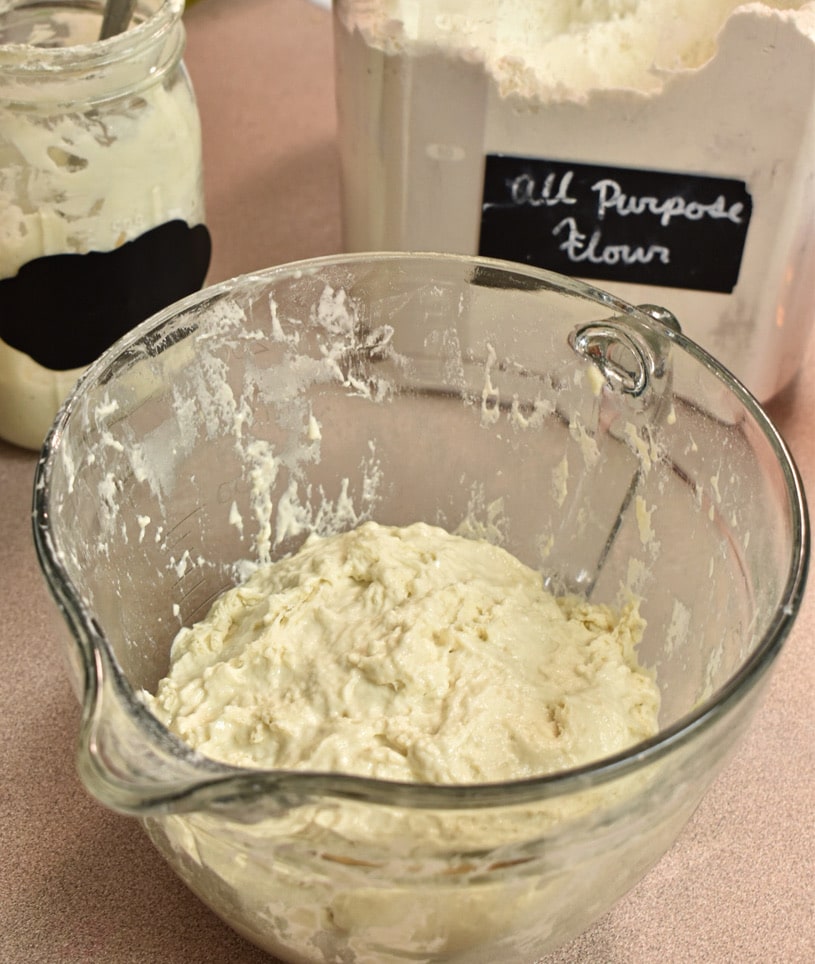
2. Add in salt and honey, this might be difficult to mix. I use a large wooden spoon and work the ingredients in gently but firmly.

3. Pour dough onto a very well floured surface, with flour covered hands knead the dough 5-6 minutes. Add flour as needed, if the dough is sticky, this can take up to 0.5c-1.5 c flour. Start with a 1/4c and knead until the dough is no longer sticky.


4. Lightly oil a large bowl, I use the same one as before, with olive oil. I place the olive oil in the bottom of the bowl and run my knuckles all around the side up to the rim. Add the dough to the oiled bowl and cover with a tea towel or plastic wrap, you could also use HOMEMADE BEESWAX WRAPS.

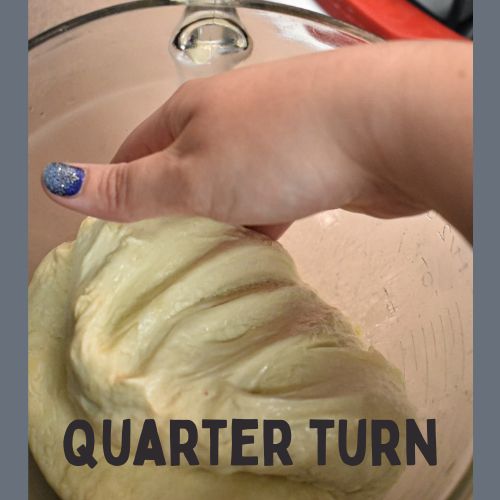
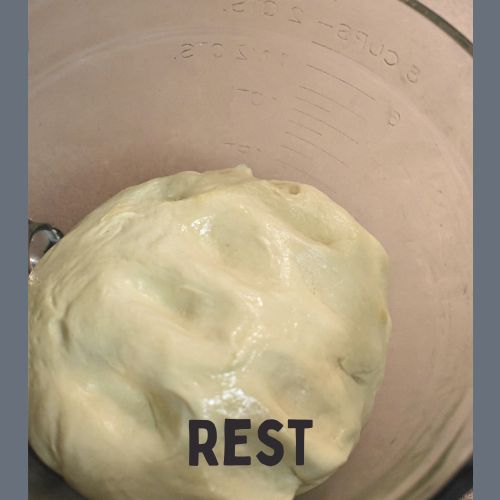
5. Rest dough for 20 minutes, perform FIRST stretch and fold. I gently stretch the dough up and fold it back into the middle. Do this about 8 times, quarter turning the bowl between each one. This completes your FIRST stretch and fold.
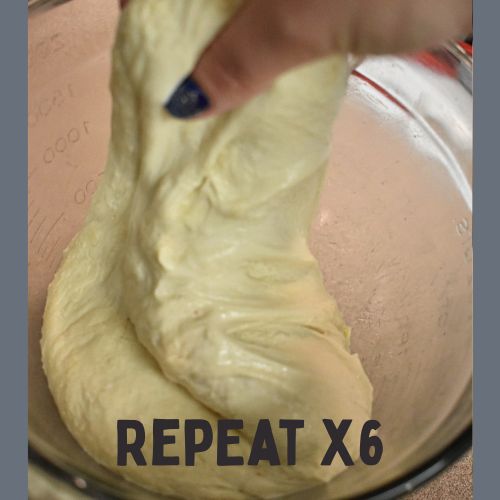
6. Allow dough to rest 20 minutes, perform SECOND stretch and fold, wait 20 minutes, perform THIRD stretch and fold, wait 30 minutes, perform FOURTH, and final, stretch and fold. You will see a noticeable difference in the texture of the dough at every fold. It will become more supple and smooth.
7. Allow tasty rustic sourdough bread to rise, covered, 3-5 hours, depending on the temperature of rising location.

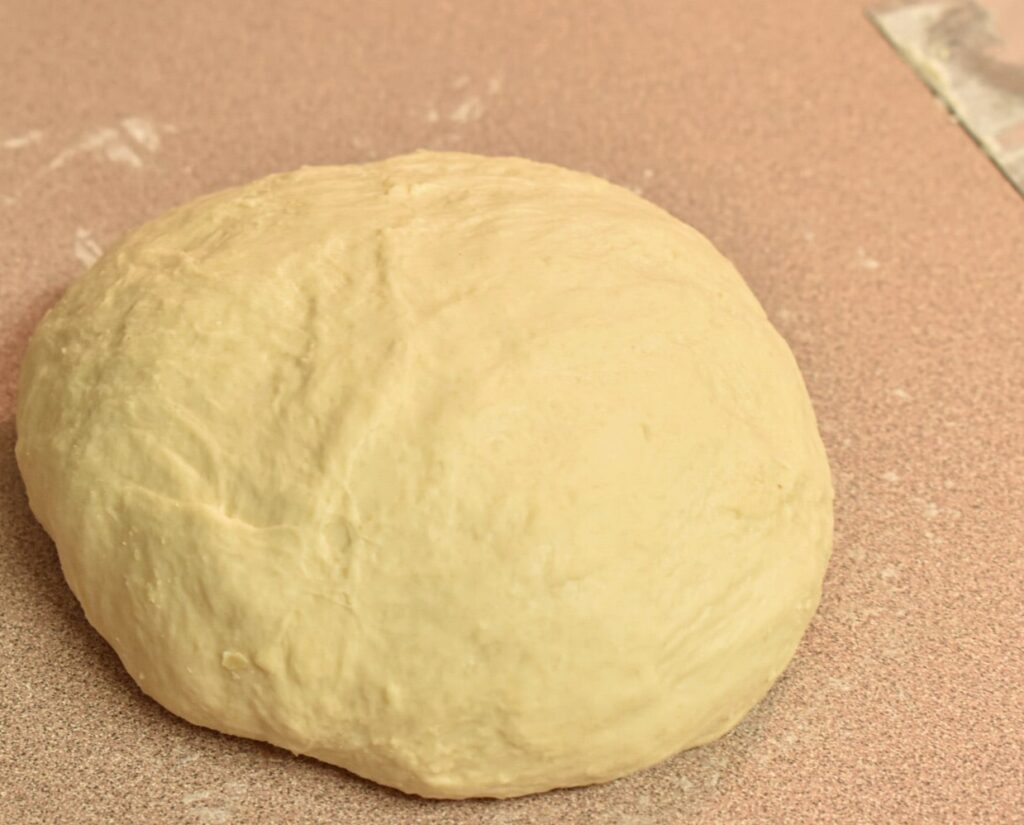
8. Gently push down the risen dough with your fist and pour it onto a lightly floured work surface. Shape the dough for 1-2 minutes. Gently pull the dough towards you With your pinkies tucked underneath, stretching the top to create the characteristic dome. If removing from the refrigerator, allow time for the bread to come to room temperature before shaping.

9. Place dough back into the same bowl, cover, and allow to rise 3-4 more hours. The long rise time allows the bread to have a strong sour flavor.
10. When ready to bake bread, place the dutch oven, top and all, into a cold oven and set to preheat 450F (232C) degrees.

11. While the oven is preheating pour the bread onto a clean counter top. Shape the dough one final time. I like to have damp hands for this so the dough sticks to me less.
12. Once satisfied with the shape, use a small sifter to lightly coat the banneton with flour, and place the bread into the banneton, shaped side down. You want the side with tension to be the top of the bread.

13. Allow bread to rise in banneton about 45 minutes. I usually let it rise until the oven is done preheating.

14. Once ready to bake, pour the bread from banneton onto parchment paper.

TIP: CUT THE PARCHMENT PAPER WITH A LONG END ON OPPOSITE SIDES FOR EASY LIFTING FROM THE DUTCH OVEN!

15. Score the top of the raw dough with a bread lame, or other sharp knife, to control the release of steam. You can carve intricate designs or simple straight lines. I recommend at least two deep cuts.
16. Place the bread, parchment paper and all, into the hot dutch oven.

17. Put the hot top back in place and bake for 25 minutes.

18. Remove the lid and bake 15 minutes more, till golden brown on top.

19. Immediately remove from dutch oven and rest on a cooling rack. This prevents the bottom from becoming too dark.
20. For best slices wait till fully cool. If you slice the bread while hot it will squish or collapse on itself.

21. Enjoy with delicious butter or jam!
I don’t have that much time! Help!
Okay, I get it! Not everyone has the ability to be home for a whole day. How can we work with this and still eat awesome bread? My advise, make the dough at night when you have at least 2.5 hours before you go to bed and you have time the next day, maybe a Friday or Saturday night. Do steps 1-6 and then place your bread in the refrigerator overnight in place of step 7. When you take it out of the fridge in the morning you should be able to treat the overnight rise as the first rise time. Allow bread to come to room temperature and continue with step 8 onward.
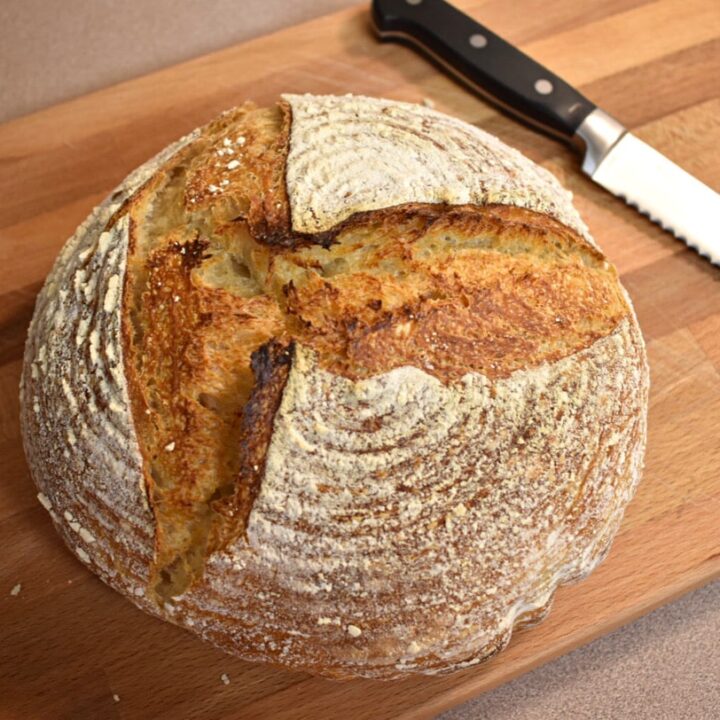
Tasty Rustic Sourdough Bread
A delicious bred with an excellent crumb and chewy texture!
Ingredients
- 1 1/4 c filtered water
- 170 g active sourdough starter
- 375 g unbleached all-purpose flour + more for kneading
- 2 tsp salt
- 1 tbsp honey
- 1 tsp olive oil
- parchment paper
Instructions
1. Combine water, starter, and flour into a large bowl, mix thoroughly. Allow to autolyse, or rest, 20 minutes.
2. Add in salt and honey, this might be difficult to mix. I use a large wooden spoon and work the ingredients in gently but firmly.
3. Pour dough onto a very well floured surface, with flour covered hands knead the dough 5-6 minutes. Add flour as needed, if the dough is sticky, this can take up to 0.5c-1.5 c flour. Start with a 1/4c and knead until the dough is no longer sticky.
4. Lightly oil a large bowl, I use the same one as before, with olive oil. I place the olive oil in the bottom of the bowl and run my knuckles all around the side up to the rim. Add the dough to the oiled bowl and cover with a tea towel or plastic wrap, you could also use homemade beeswax wraps.
5. Rest dough for 20 minutes, perform FIRST stretch and fold. I gently stretch the dough up and fold it back into the middle. Do this about 8 times, quarter turning the bowl between each one. This completes your FIRST stretch and fold.
6. Allow dough to rest 20 minutes, perform SECOND stretch and fold, wait 20 minutes, perform THIRD stretch and fold, wait 30 minutes, perform FOURTH, and final, stretch and fold. You will see a noticeable difference in the texture of the dough at every fold. It will become more supple and smooth.
7. Allow tasty rustic sourdough bread to rise, covered, 3-5 hours, depending on the temperature of rising location.
8. Gently push down the risen dough with your fist and pour it onto a lightly floured work surface. Shape the dough for 1-2 minutes. Gently pull the dough towards you With your pinkies tucked underneath, stretching the top to create the characteristic dome. If removing from the refrigerator, allow time for the bread to come to room temperature before shaping.
9. Place dough back into the same bowl, cover, and allow to rise 3-4 more hours. The long rise time allows the bread to have a strong sour flavor.
10. When ready to bake bread, place the dutch oven, top and all, into a cold oven and set to preheat 450F (232C) degrees.
11. While the oven is preheating pour the bread onto a clean counter top. Shape the dough one final time. I like to have damp hands for this so the dough sticks to me less.
12. Once satisfied with the shape, use a small sifter to lightly coat the banneton with flour, and place the bread into the banneton, shaped side down. You want the side with tension to be the top of the bread.
13. Allow bread to rise in banneton about 45 minutes. I usually let it rise until the oven is done preheating.
14. Once ready to bake, pour the bread from banneton onto parchment paper.
15. Score the top of the raw dough with a bread lame, or other sharp knife, to control the release of steam. You can carve intricate designs or simple straight lines. I recommend at least two deep cuts.
16. Place the bread, parchment paper and all, into the hot dutch oven. (See Note 1)
17. Put the hot top back in place and bake for 25 minutes.
18. Remove the lid and bake 15 minutes more, till golden brown on top.
19. Immediately remove from dutch oven and rest on a cooling rack. This prevents the bottom from becoming too dark.
20. For best slices wait till fully cool. If you slice the bread while hot it will squish or collapse on itself.
21. Enjoy with delicious butter or jam!
Notes
1. Cut the parchment paper with a long end on opposite sides for easy lifting from the dutch oven!


Leave a Reply